
I made a website! And Ombre Rainbow Cookies!
It’s time to give Tremonte’s Italian American a bona-fide home on the internet. So here we are! A website! And some real talk – I am not good at this sort of thing. Mixing flour, sugar and butter in a way that’s delicious – I’d say that comes naturally to me. Formatting a website about said deliciousness, not so much.
But, it’s time. My content needs a home with more space to write up recipes, stories, and document the process of becoming a real bakery!
Luckily, I happen to be married to a person who is actually good at computers and helped me to get this thing off the ground. Honestly, I could not have done it without his help. So here we are!
About that other fiddly task – Italian Rainbow Cookies.
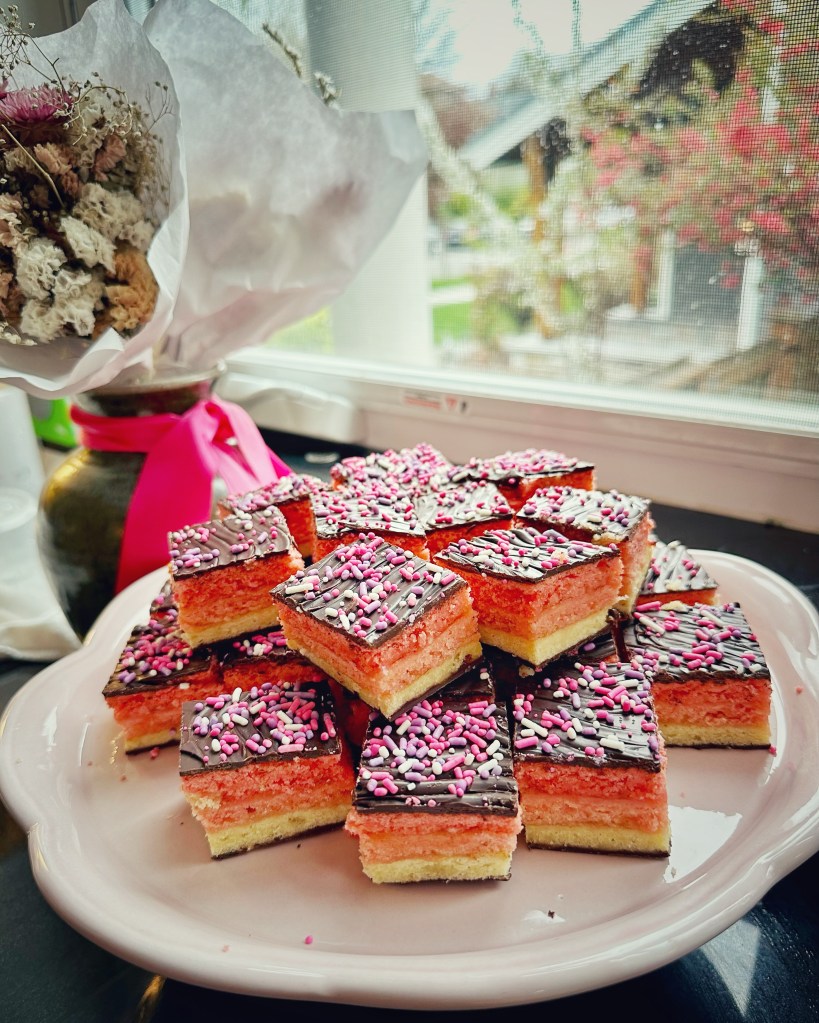
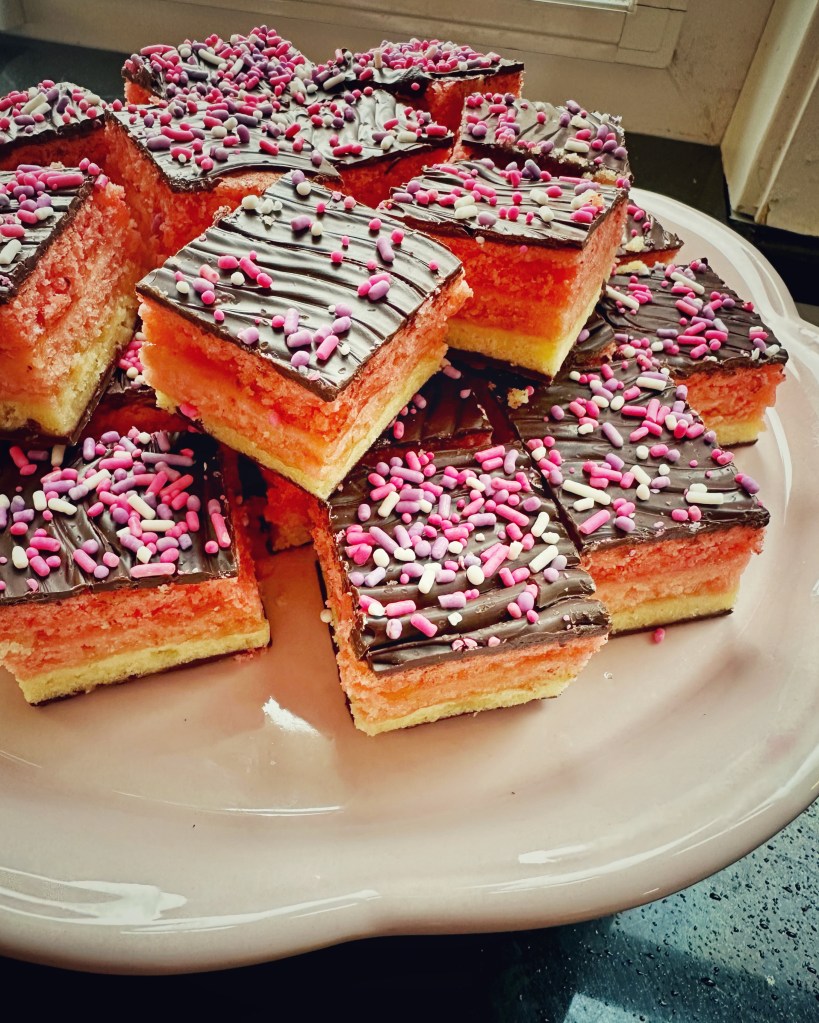
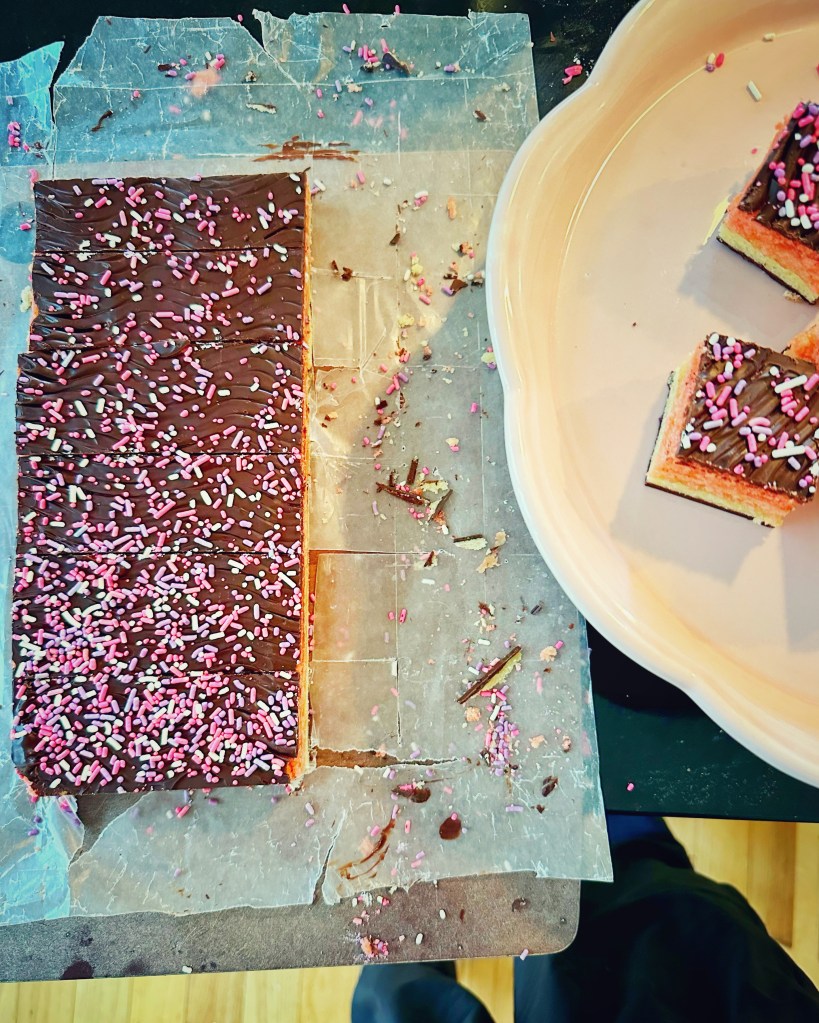
I first had one these bright little nuggets years ago in New York, in the sort of place where one buys cookies by the pound. And to be honest, the old-school East Coast or Chicago Italian bakeries are really the only places I’ve seen them. They claim to be cookies, but are actually mini almond layer cakes. The layers are traditionally colored red, white and green to represent the Italian flag. I like to make them that way around the holidays, but also love riffing on the colors the rest of the year. This particular batch are pink ombre.
My method for making these was the result of a happy accident. Most recipes have you cream the butter and sugar together and proceed the way you would make a cookie recipe. But, once when I was making these I threw the sugar, almond paste and dry ingredients all in together, because I wasn’t thinking deeply about what I was doing, and then mixed in the butter. So, I accidentally made them with the reverse creaming method and, low and behold, they turned out great. Seeing as these cookies are actually cake, it makes sense. And it cuts down a step or two in a baking project has a lot of steps. So without further ado, my Italian Rainbow Cookies recipe… Give it a whirl, or don’t, and just wait for my bakery pop-up to launch. I promise I will have these in all their fiddly glory.
Italian Rainbow Cookies
Yield: About 40 cookies
Time: About 2 hours
Ingredients:
| 1c (200g) granulated sugar |
| 8oz (225g) almond paste |
| 2c (255g) all-purpose flour |
| 1/2t kosher salt |
| 1 1/2c (3 sticks, 340g) unsalted butter, at room temperature |
| 4 eggs, whites and yolks separated |
| 1/4t almond extract |
| 1/2t clear vanilla flavoring |
| gel food coloring in any colors you like |
| 12oz (340g) apricot or raspberry jam |
| 8oz (227g) bittersweet chocolate wafers (or chocolate bar finely chopped) |
| sprinkles |
- Pre-heat oven to 350F. Cut parchment to fit the bottoms of 3 quarter sheet pans or 9″x13″ baking dishes. Butter pans and line with parchment pieces.
- Mix sugar and almond paste in the bowl of a stand mixer (or in a bowl with a hand mixer). Beat with the paddle attachment until the almond paste is broken up into little uniform bits and the mixture looks sandy.
- In a separate bowl, whisk together flour and salt.
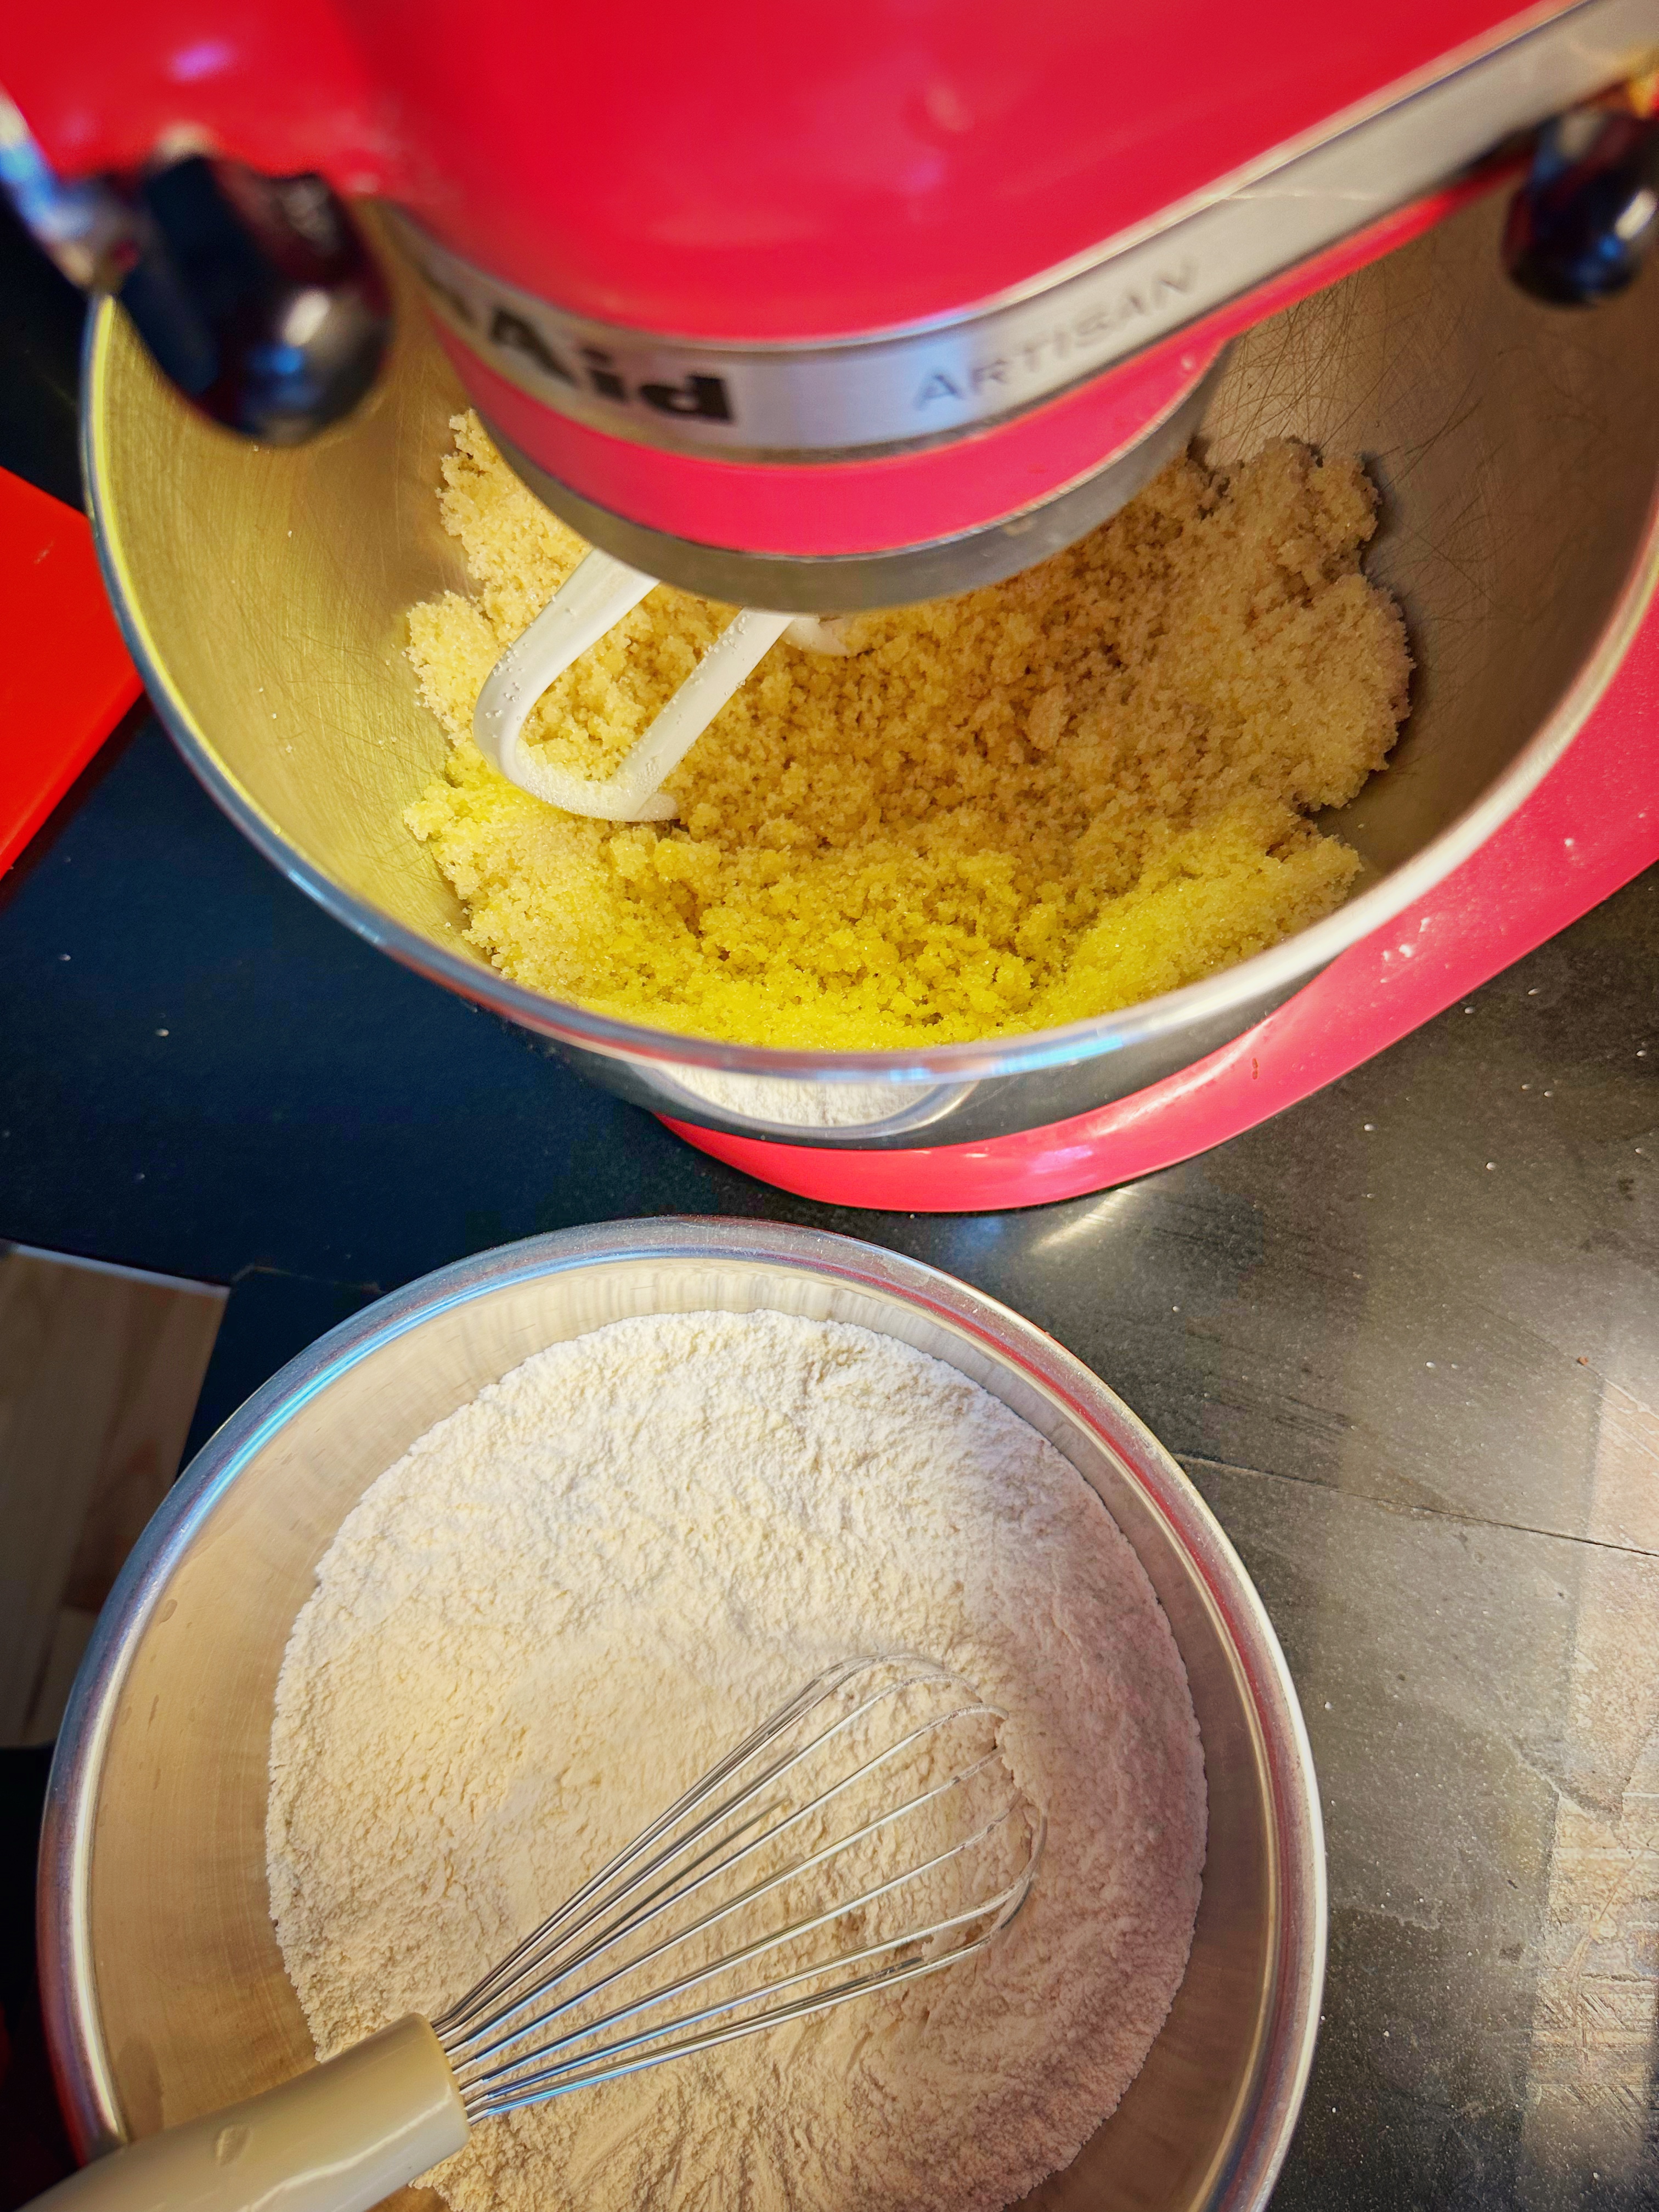
- Add flour mixture to the sugar mixture and mix until well combined.
- Add butter to the flour and sugar mixture and beat on medium speed until light and fluffy. Stop and scrape down the sides of the bowl a couple times during this process to make sure it is evenly mixed.
- In a separate small bowl, mix the egg yolks with the almond and vanilla extracts.
- Add the egg yolk mixture to the bowl of the stand mixer and beat until smooth.
- In a separate, medium sized, bowl, whisk the egg whites to stiff peaks.*
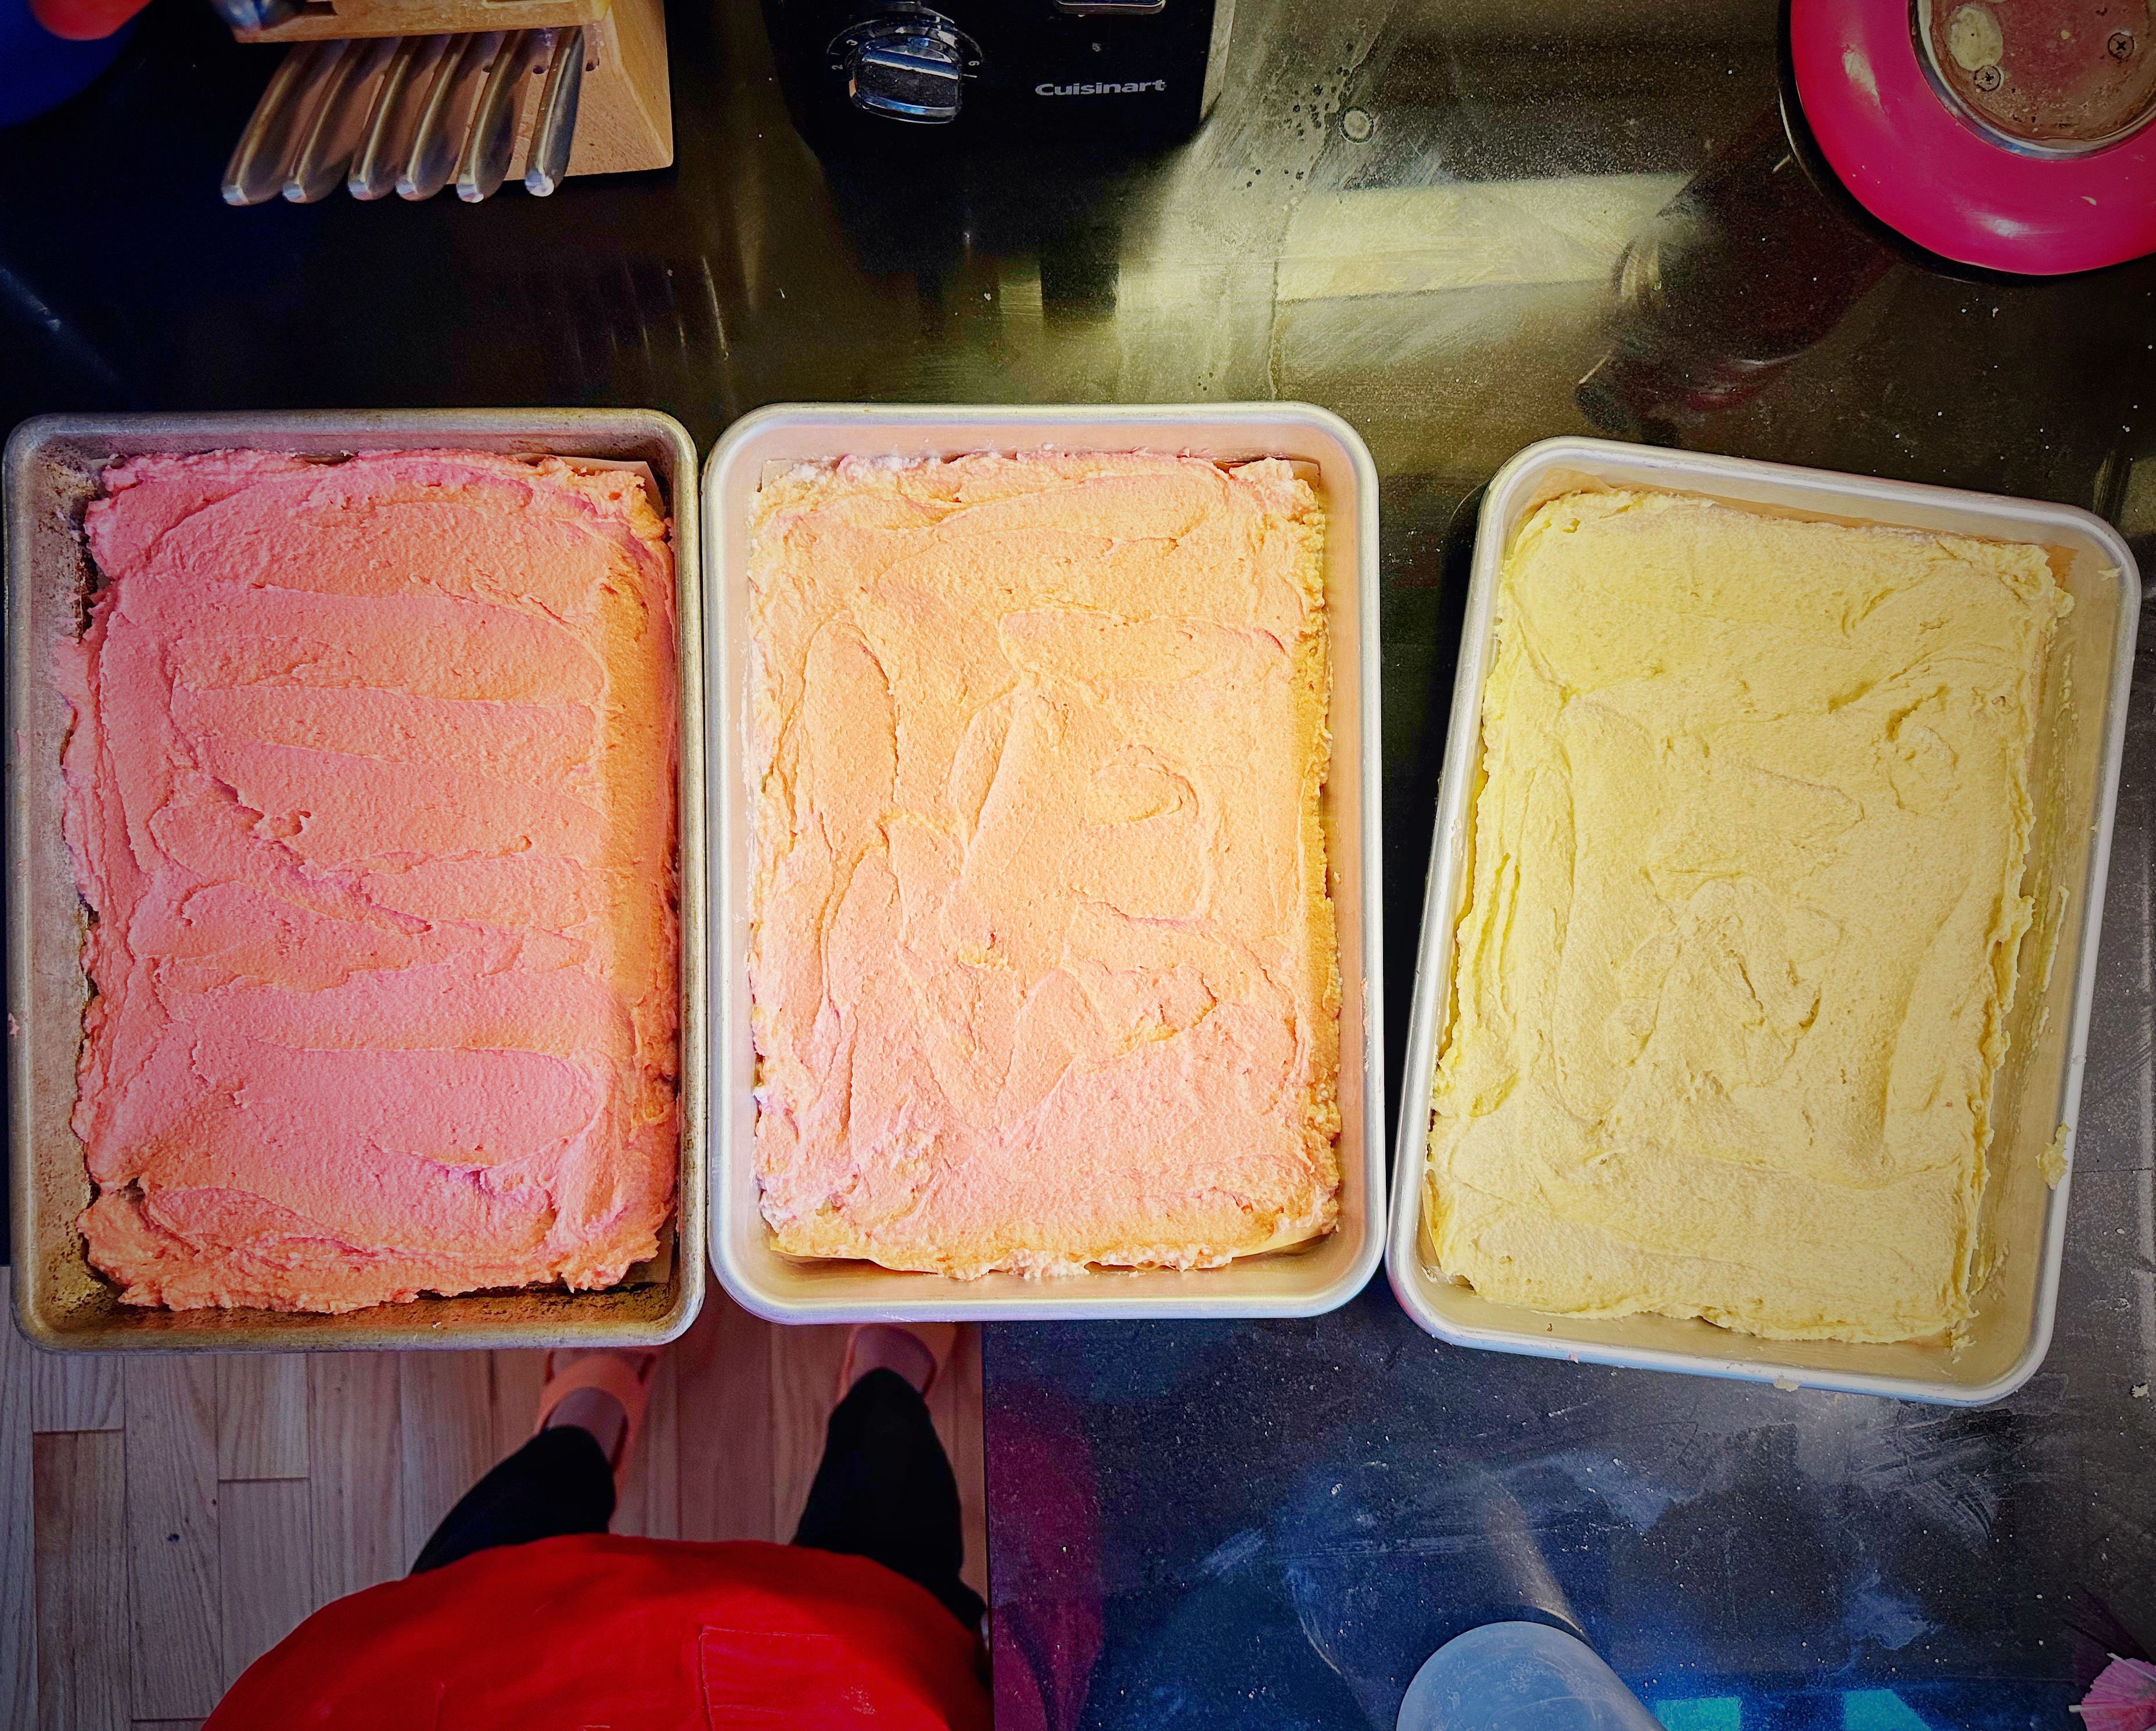
- Divide your batter into three even sections, in three separate bowls. Do the same with your egg whites. You can do this by eye, or you can weigh out each component.**
- Add a few drops of food coloring to each separate bowl, leaving one natural if you like. Mix the food coloring in well.
- Fold egg whites into each portion of dough until just combined.***
- Spread the separate batters into each of the prepared pans with an offset spatula, evenly, all the way to the edges of the pan.
- Bake for 10-11 minutes, until the cake is baked, but not browned. A probe thermometer inserted in the center of the pan should read 190F.
- Transfer pans to a cooling rack. Allow to cool completely in the pans before moving on to the next step.
- Set a half sheet tray lined with parchment on the work surface. Remove the top cake layer from its pan by running a small knife around the edges and then carefully tipping it out onto the sheet tray. Remove the parchment layer from the (now) top side of the cake.
- Heat jam in a small saucepan and strain though a sieve.**** Spread half of the jam evenly over the first cake layer.
- Remove the second cake layer from its pan in the same manner as the first. Carefully tip in out onto the first cake layer and remove the parchment.
- Repeat steps 16 and 17 with the remaining jam and final cake layer.
- Place one of the quarter sheet pans on top of your cake layer stack and move the whole thing to the freezer for half an hour to overnight.*****
- Melt half of the chocolate (4oz) in a double boiler or in the microwave in 30 second bursts until fully melted and smooth.
- Remove the cake from the freezer and spread the melted chocolate evenly across the top, all the way to the edges. Place a piece of parchment or wax paper on top of the chocolate layer and return to the freezer for 5 minutes.******
- Remove the cake from the freezer and flip it out by placing a cutting board on top of the cake and inverting the whole thing. Replace the half sheet tray on the work surface and slide the cake back onto it from the cutting board.
- Repeat step 20 with the rest of the chocolate (in the same bowl) and spread evenly over the top of the cake. If you like, embellish it by running the tines of a fork through the solidifying chocolate in a wavy pattern and topping with sprinkles. Work quickly as the chocolate will be cooling and hardening on the frozen cake. Return the cake to the freezer for another 5 minutes.
- Pull the cake out of the freezer and place on a large cutting board.
- Trim the edges using a sharp serrated knife. Cut lengthwise into 1 inch wide strips and then again into 1 inch strips crosswise.*******
Rainbow cookies will keep for a week stored in an airtight container at room temperature. I expect they will keep much longer stored in the fridge or freezer, but we have never managed to keep them around long enough to find out.
Recipe Notes:
* (Step 8) Alternatively, this step can be done in the stand mixer – turn out the batter into a separate bowl, wash the bowl of the sand mixer well, and then whip your egg whites.
** (Step 9) For this recipe, I weighed the dough into three 335g portions and the whites into three 45g portions.
*** (Steps 9-11) Most recipes have the egg whites folded into the batter in bulk and then dividing into three sections to color. This is totally fine, and an easier way to do this. I, however, add the egg whites after coloring the dough to avoid beating the volume out of the egg whites while mixing in the color.
**** (Step 16) Straining and sieving the jam ensures a smooth application. However, it’s fine to skip this step if you don’t mind a few little lumps and bumps in your filling.
***** (Step 19) Many recipes will have you weight down the top of the cake with a heavy book or cans. I find this isn’t necessary for getting the layers to adhere to each other and not doing it will save room in the freezer.
****** (Steps 21 and 23) At this stage it is important freeze the cake for 5 minutes, not longer, because you want the chocolate layer to be set, but not fully hardened, so that you can cut through it in the slicing phase. If the chocolate becomes too hard, it will crack and create mangled, uneven slices.
******* (Step 25) Depending on how much trimming I have to do, I usually get 5-6 lengthwise strips, and 7-8 crosswise. You may end up with more or less depending on the size of cookie you want.
Whew! Was that a long enough recipe for a first post?!?
I think my next one will be shorter, and less fiddly, and maybe for a beverage, because after all that work, a drink is looking pretty good!
